In-House Exams
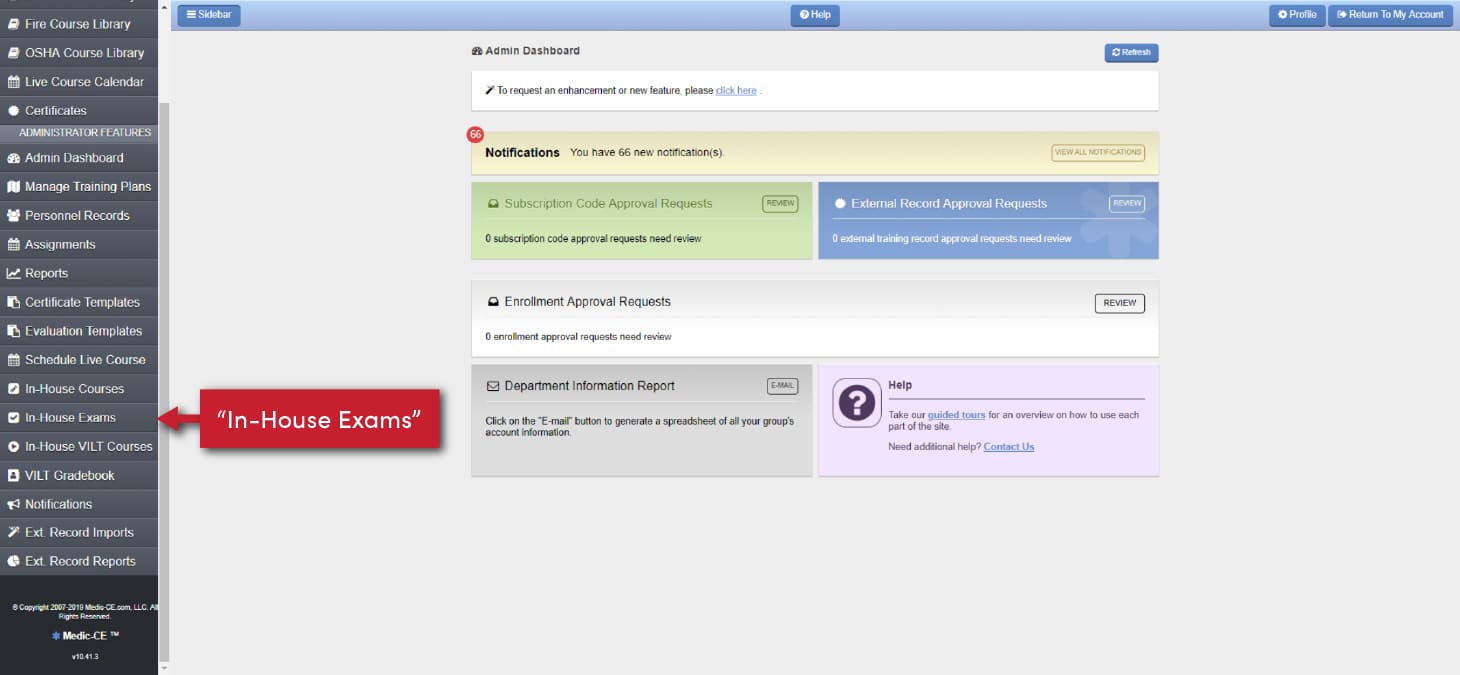
In-house exams help you provide online exams for training you are teaching in a classroom setting. The setup of the exam works very similarly to creating in-house courses except no course slides are uploaded. To begin, click the “In-House Exams” button on the left-hand navigation.
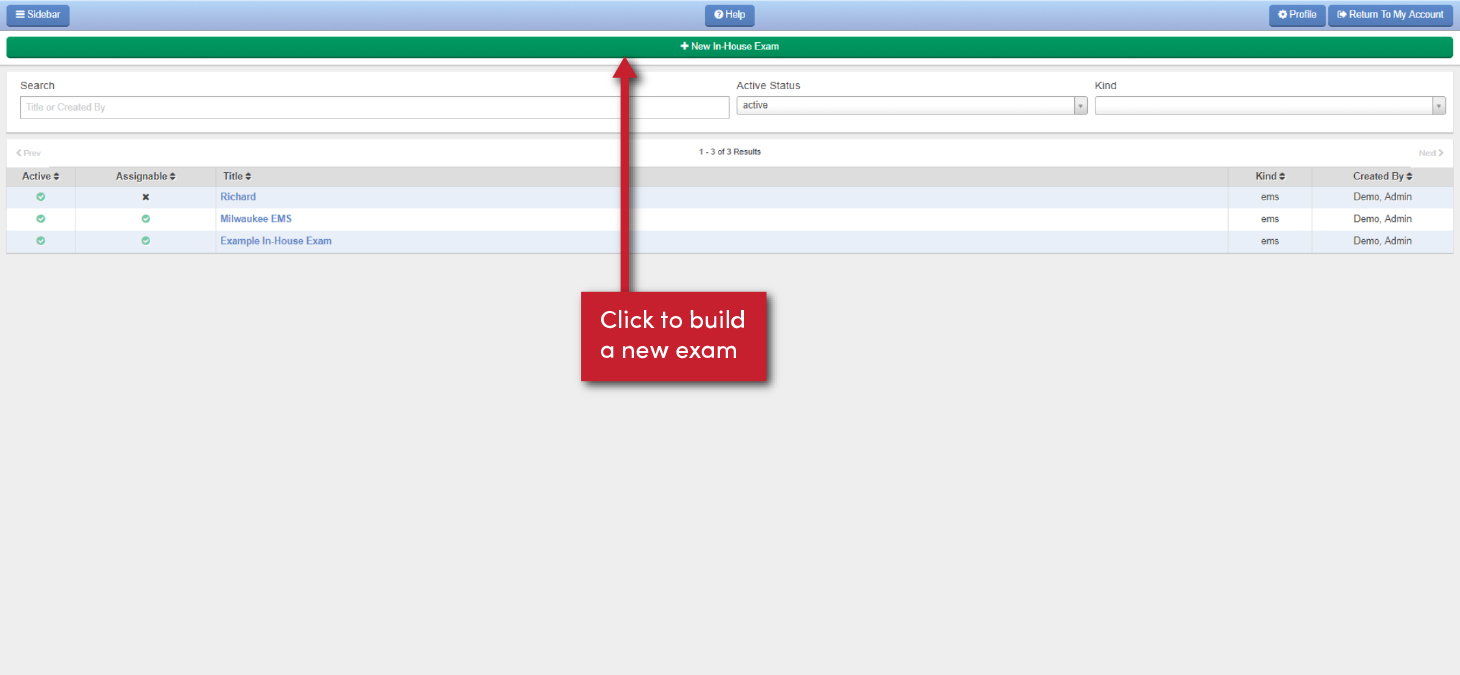
Any in-house exams you’ve already built will be listed here. To create an exam, hit the “New In-House Exam” button at the top.
Creating the Exam
There are 5 steps you must complete to build an in-house course.

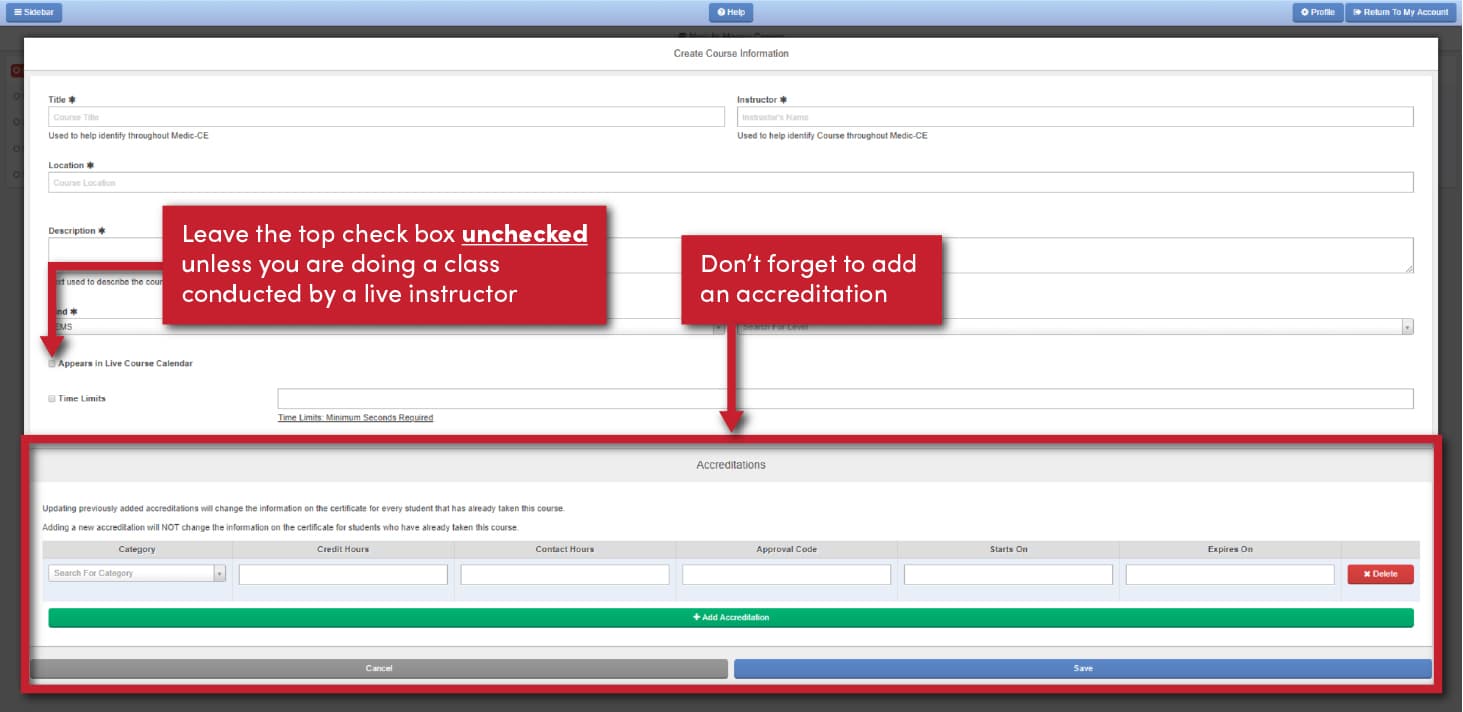
Step 1—Create Exam Information
First, you need to provide information about the course. The title of the course will be displayed to your employees, so make it something easy to interpret. The location will be “Online.” The description of the course will be visible to your employees in the course library. The kind field is used to designate which course library the course will appear in, i.e. EMS, fire, etc. The instructor can be your department’s name or the educator from your department who created the course.
If you require a time limit on the exam, click the “Time Limits” checkbox and put the number of seconds allowed to take the exam.
Next, you can add accreditation to the course. If you have a course with multiple categories and hours, that information can be applied here. The approval code is your department’s EMS Accreditation Training Entity Number given to you by your state. The start date is important as it determines when users can access the course. The expiration date is when the accreditation will expire.
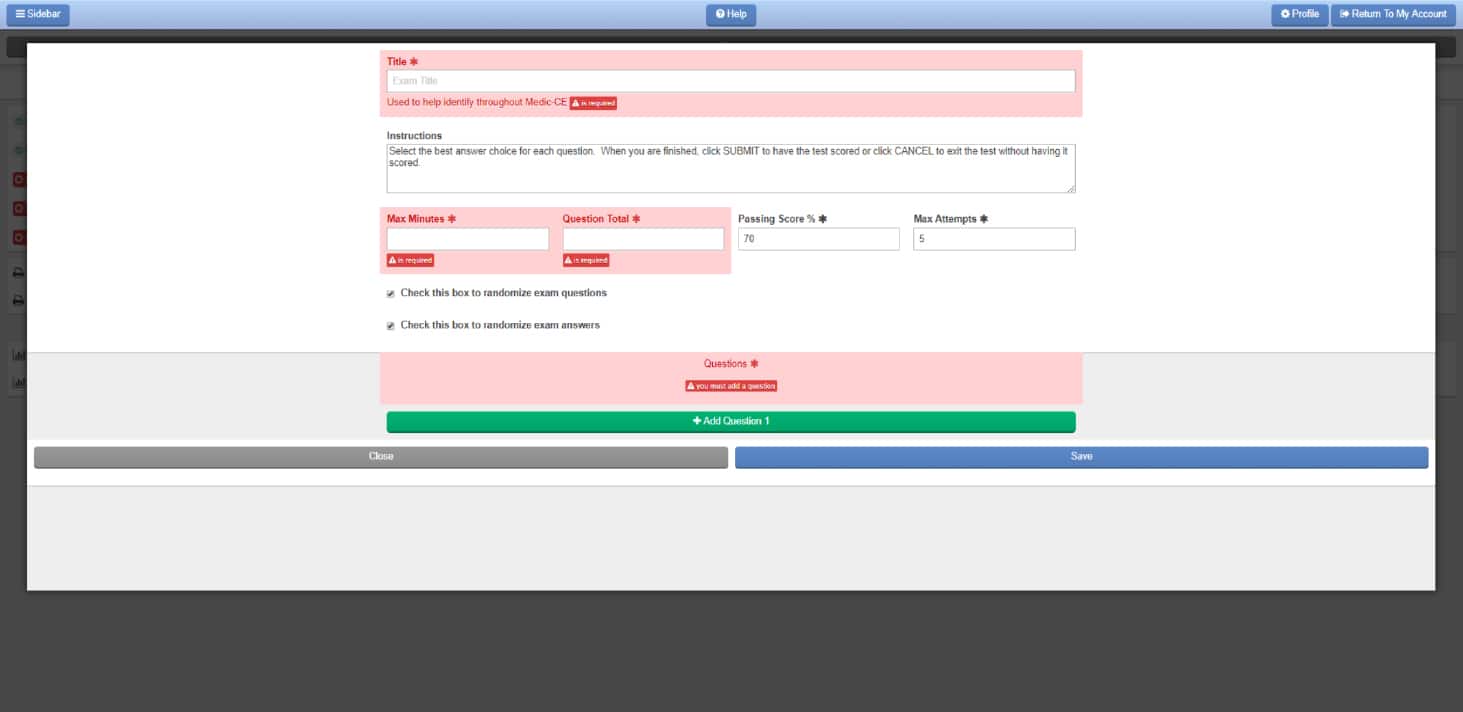
Step 2—Add an Exam
Now, you are ready to build the course exam. You can define how many minutes the exam allows. The Question Total field is where you define the number of questions the exam will have. You can adjust the scoring and the number of attempts available before your personnel need permission to re-test. Exam questions and answer order can be randomized.
After defining the setting, you need to create the exam questions. The questions can be, or contain, images. All questions require an explanation of the correct answer. After all of the questions have been added, hit the “Save” button.
Step 3—Add an Evaluation
The next step is to select an Evaluation Template from the drop-down menu. If you have not yet built an evaluation template, see how to do that in the Certificate and Evaluation Template article.

Step 4—Add a Certificate
The last step is to select a Certificate Template from the drop-down menu. If you have not yet built a certificate template, see how to do that in the Certificate and Evaluation Template article.

Activating and Editing Your In-House Exam
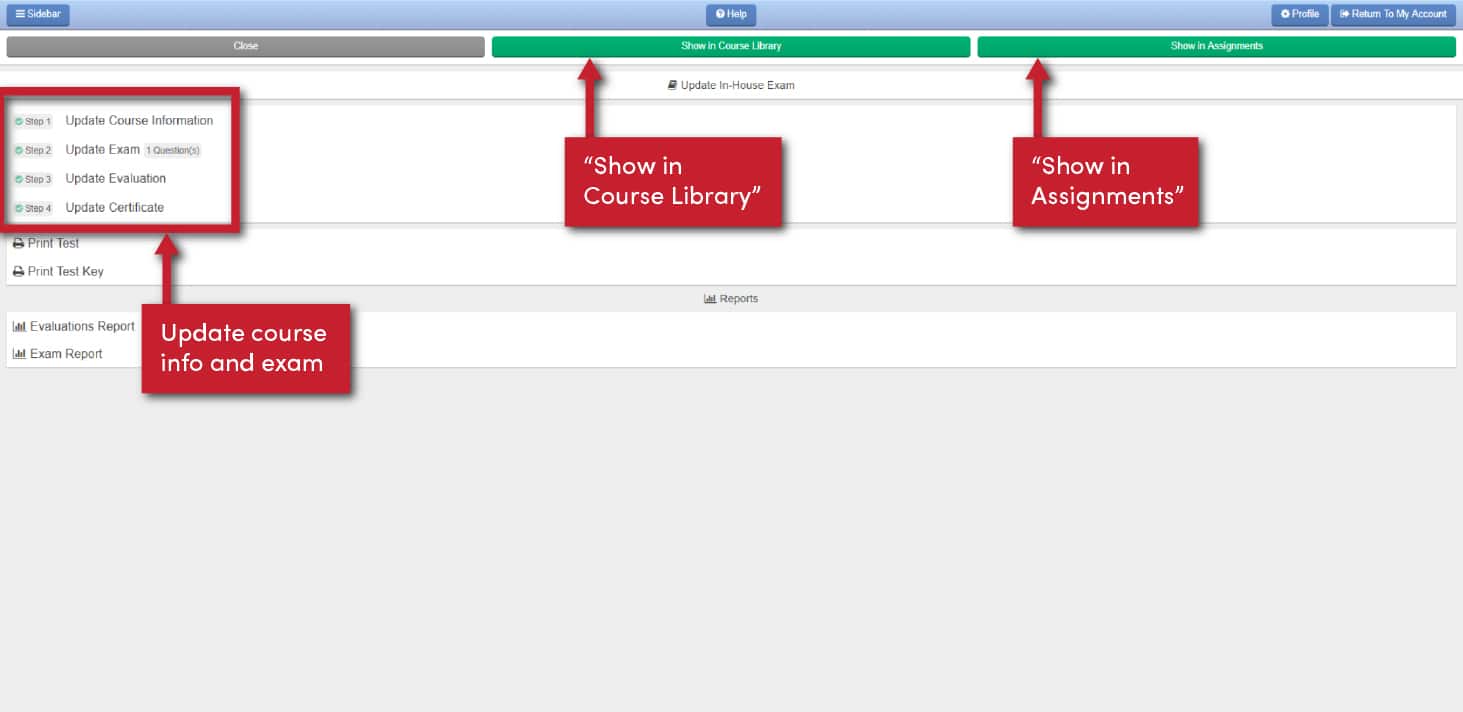
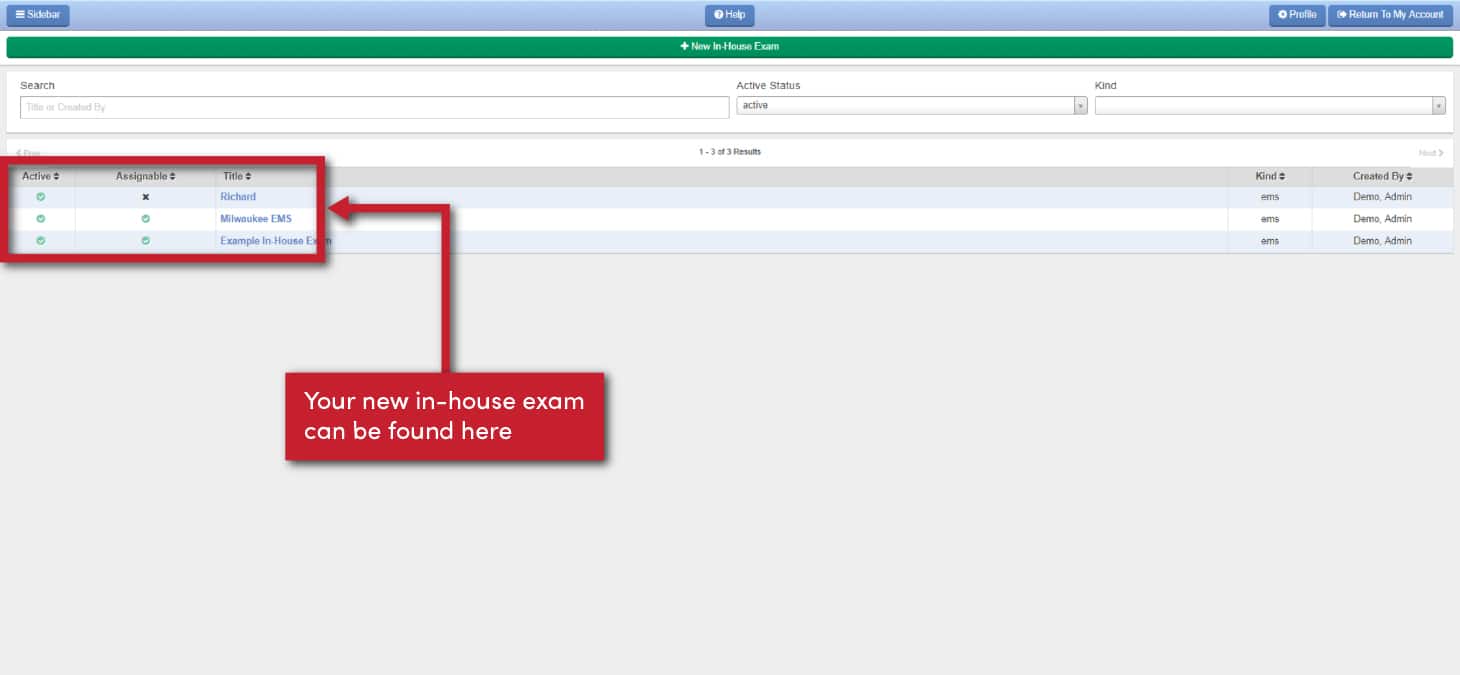
Your in-house exam should now show in the list of in-house exams. Click on the title to edit or activate it.
You can also print the test key and the exam. Once you start having completions, you’ll be able to review the Evaluation Report and Exam Report.
If you would like to make your exam available for your employees in the course library, click the “Show in Course Library” box. You will receive a notification that the course saved successfully, and the exam will then show in the library you chose when creating the course. If you want to course to be made available by assignment, click the “Show in Assignments” box. This will allow you as an administrator to assign the exam to your staff, but they will not be able to enroll in the exam on their own. You can have both options available by simply clicking both buttons. Once you have finished editing the exam, click the “Close” button.